Pre-Requisites
Install Requirements
This is specific to Self Hosted deployments. For Sath hosted connectors, these requirements are already in place.
- You need to install Helm version 3 or above.
- You can use Kubernetes cluster (1.26 or above) to install the connector
Connection Requirements
Below is needed to connect to Entra ID
- An active Microsoft Entra ID Subscription
- Entra ID Application credentials
- Client ID
- Client Secret
- Tenant ID
Application Registration and Setup
An application (Entra ID terminology) will need to be registered within Entra ID instance for granting our connector permission to call the Microsoft Graph API.
To create a new application in Entra ID, follow the steps below:
- Login with administrator credentials in your Entra ID instance
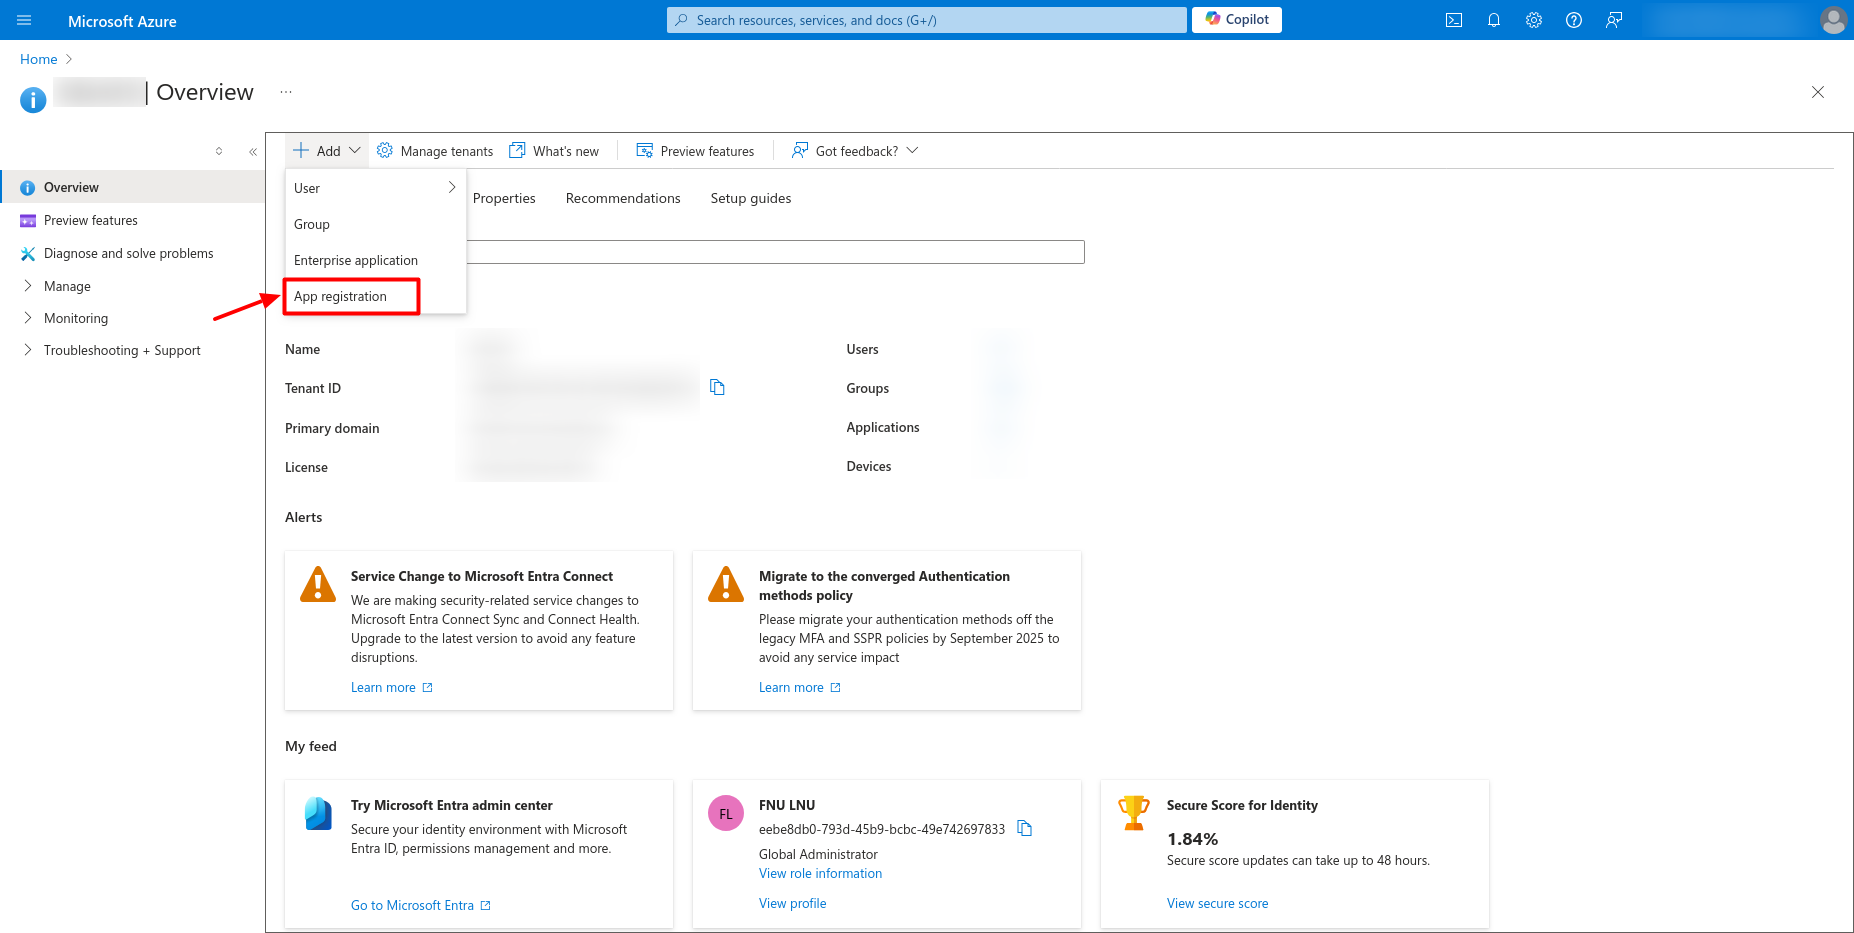
- Go to your Entra ID instance
- Click on Add (At the top)
- Click on App Registration to create a new application (This application will be the anchor between IDHub and Entra ID)
- Provide a name for the application and for supported account types, pick “Accounts in this Organizational Directory Only” and hit on “Register”
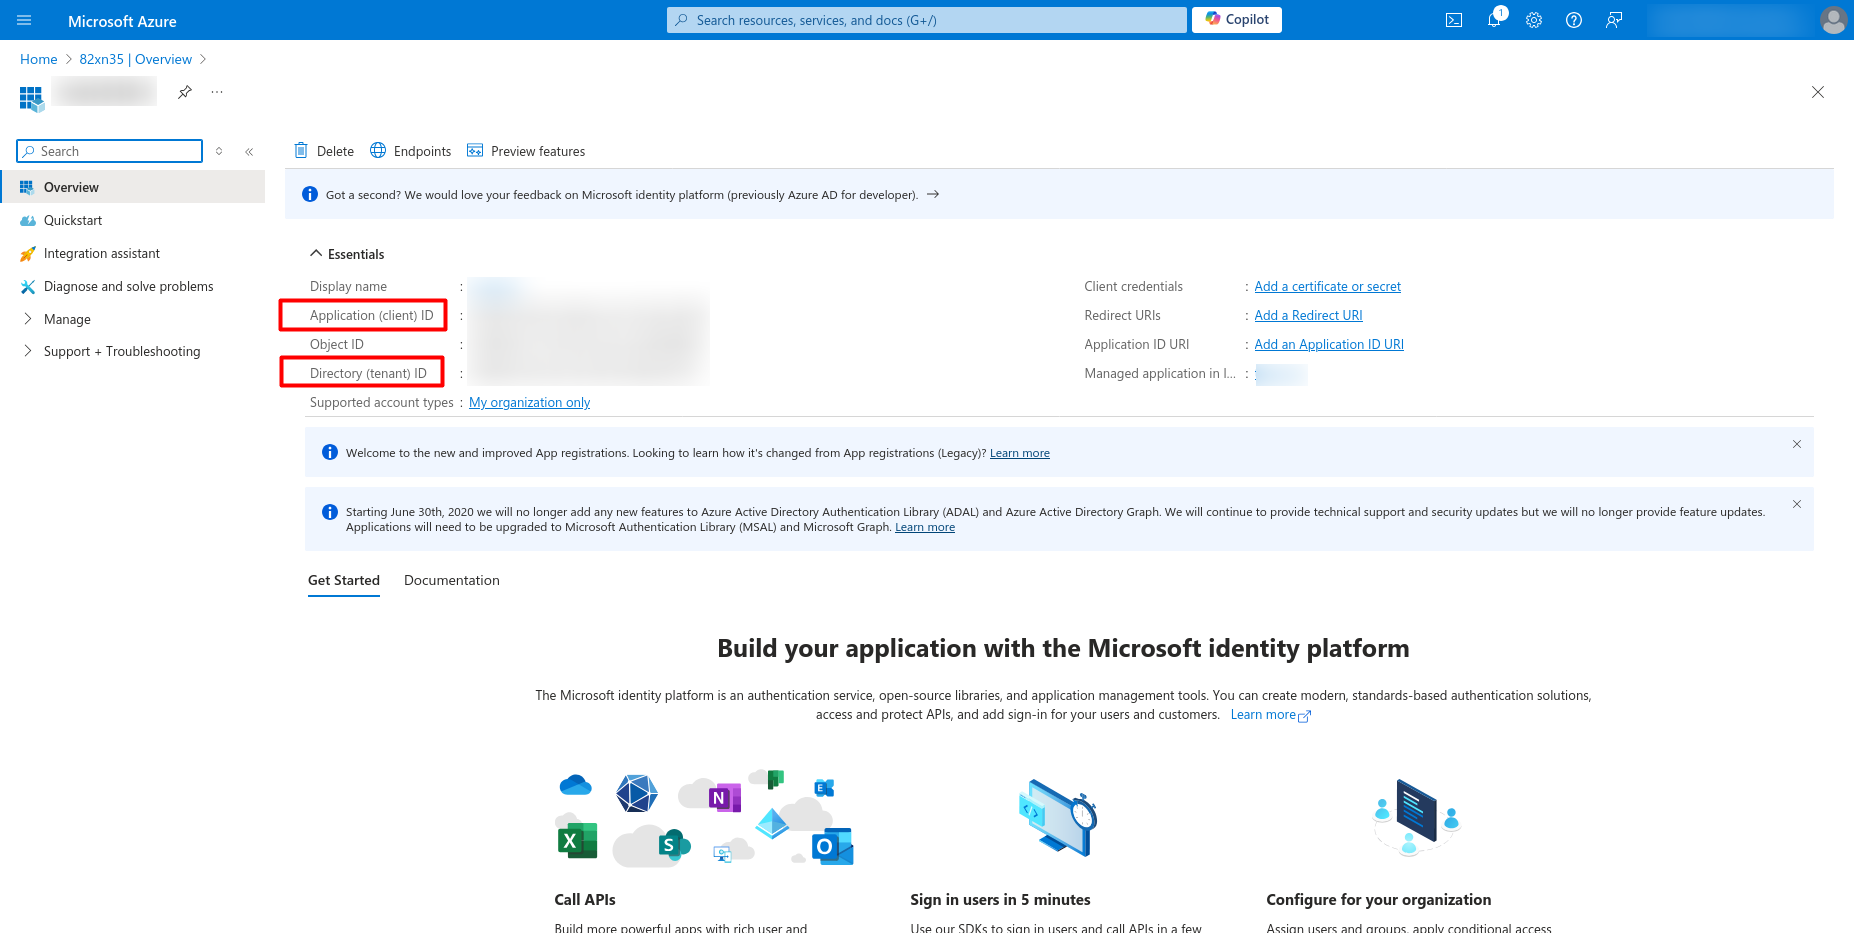
- Copy the values for Client ID, Tenant ID and save them for later use. (These will be used to authenticate the connection between IDHub and Entra ID)
- Next, Click on
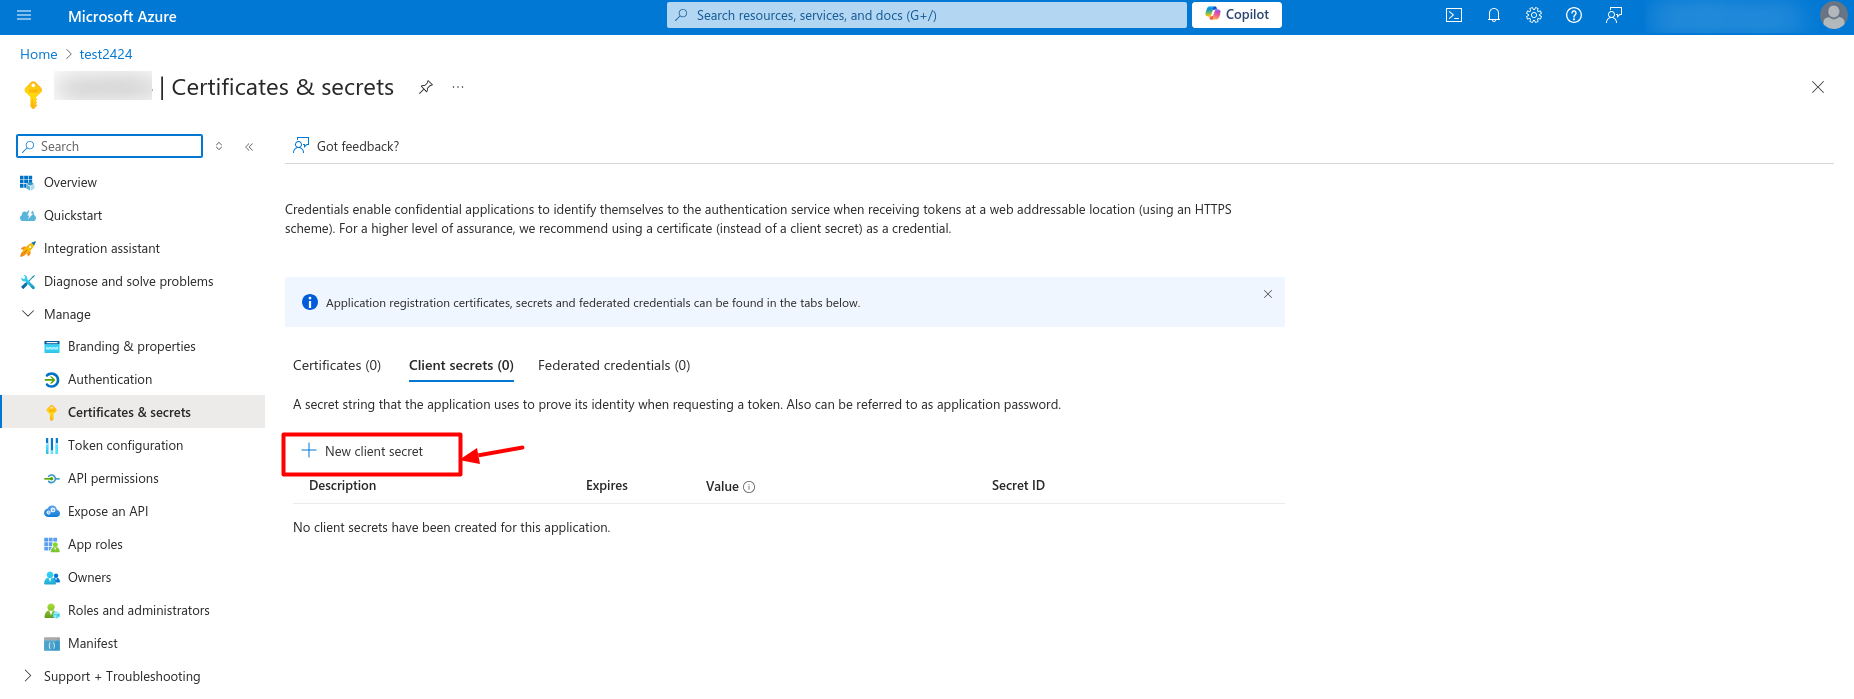
Manageand then Click onCertificates & secrets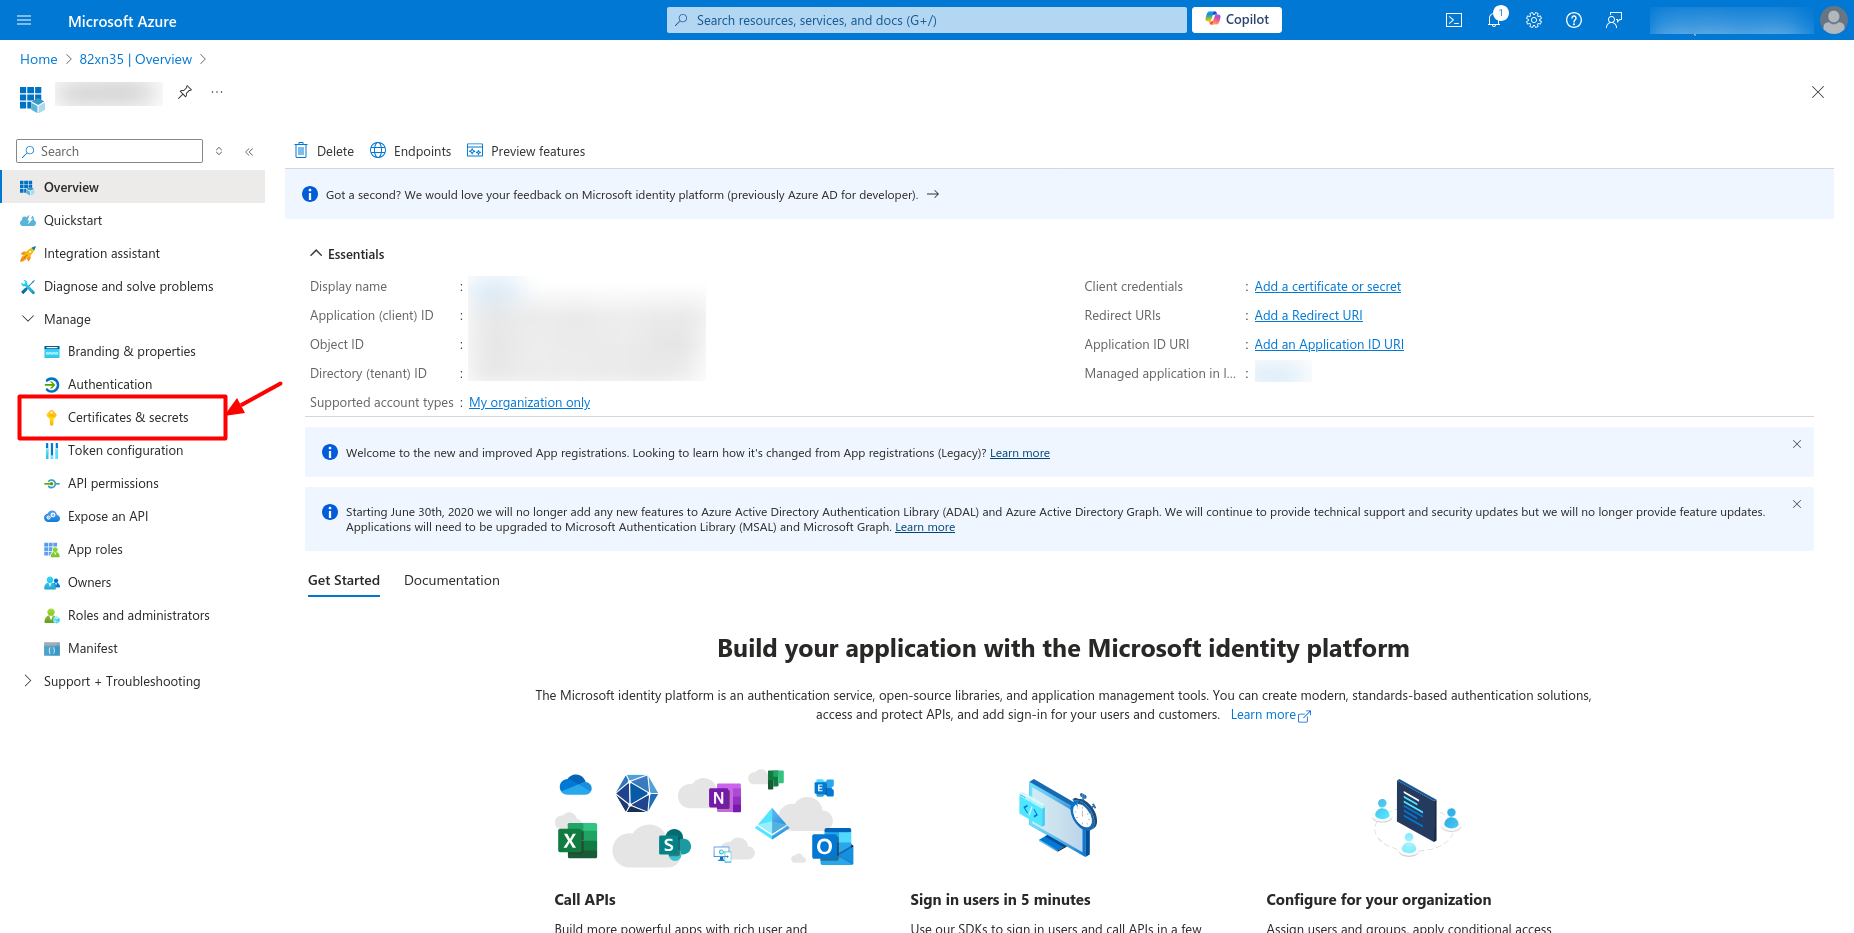
- Go to Client Secrets section and Click on + New client secret to add a new client secret
- To add new client secret, add secret description and expiry and then click on Add button in the bottom of the page
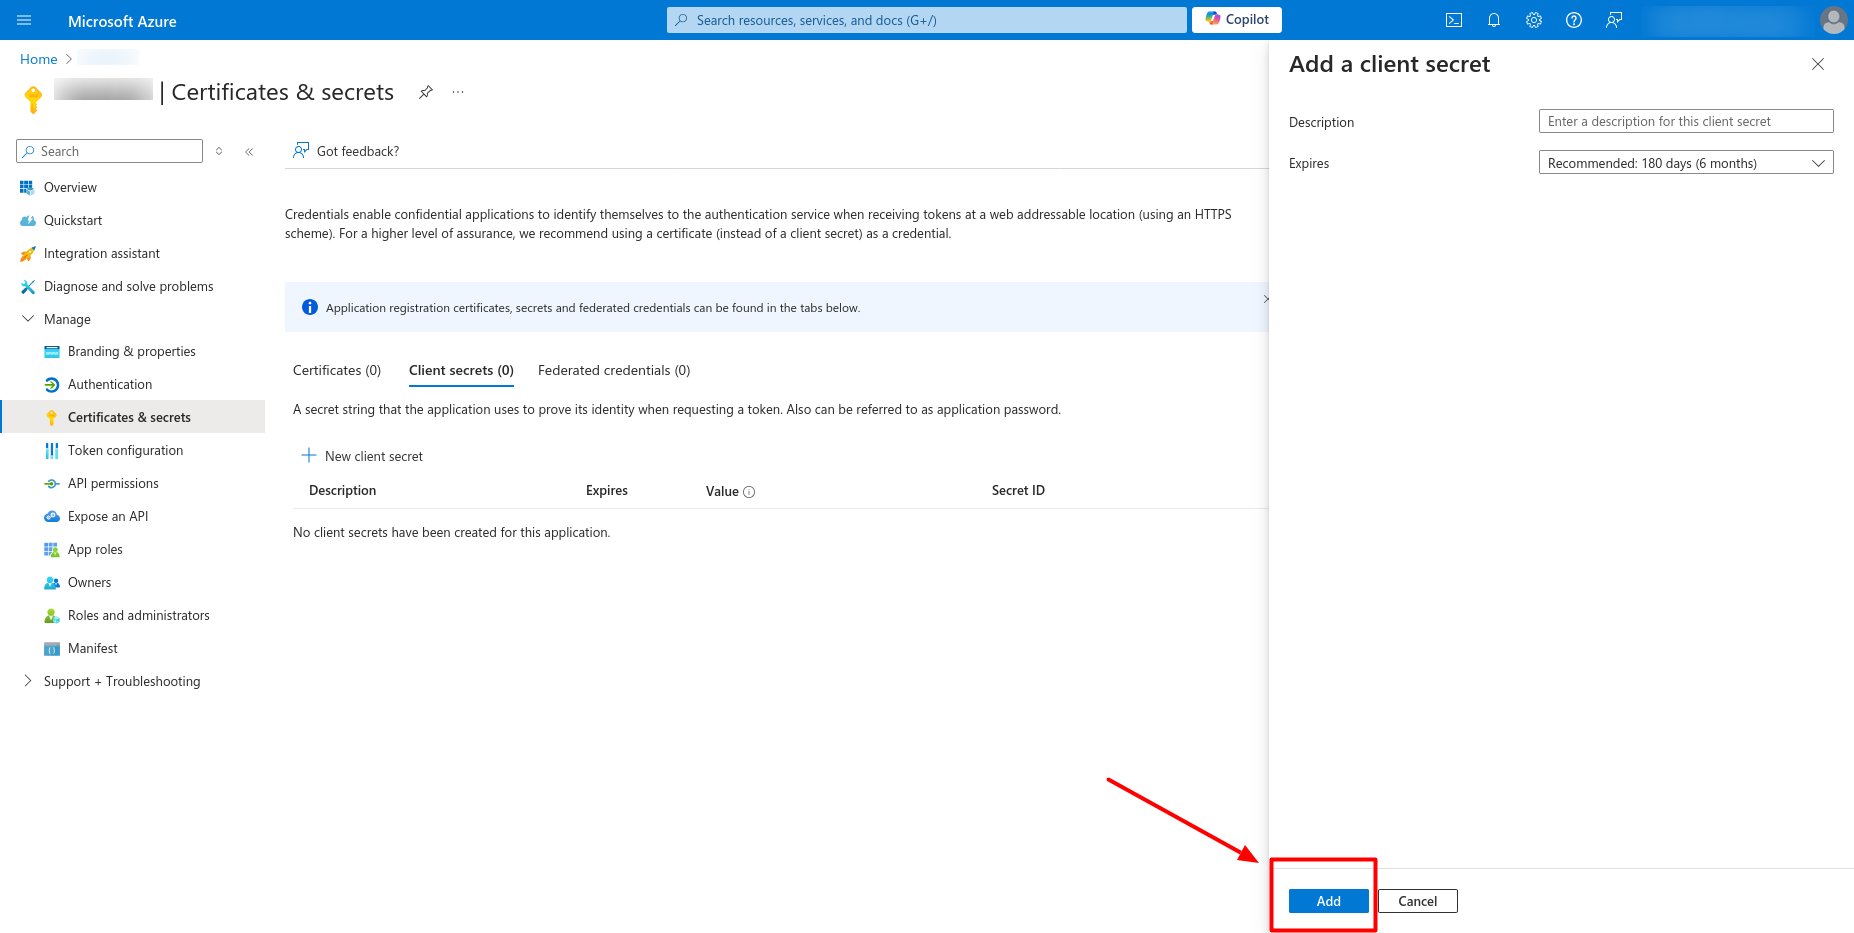 info
infoIf Expiry is 6 months or 12 months, the secrets will need to be updated in the Connector Manager post expiry for continued provisioning and reconciliation.
- Copy the Client Secret value by clicking on the copy icon and save it.
Your application is now registered successfully. Make sure to save Client ID, Tenant ID and Client Secret from the application. These will be used while connecting IDHub to application.
Permissions
Post registration, the application added in Entra ID will be need to required permissions to perform various functions.
Required Permissions
To perform basic directory operations below permission needs to be provided to the application registered in Entra:
- Read Directory Data - Directory.Read.All
- Read and Write Directory Data - Directory.ReadWrite.All
Post that detailed permissions are available to manage and control specific entitlements and licenses across Entra. See below for more information:
| Permission | Type | Purpose |
|---|---|---|
| User.Read.All | Application | Account Reconciliation, Fetch Objects like Roles and Groups Membership |
| User.ReadWrite.All | Application | Create User, Update User Properties (Non Entitlement), Add / Remove License Pack and Plan, Enable/ Disable User Account, Delete User |
| Organization.Read.All | Application | Reconcile License Pack and Plan Details of tenant |
| RoleManagement.ReadWrite.Directory | Application | Add / Remove Directory Roles and Role Provisioning |
| RoleManagement.Read.Directory | Application | Role Reconciliation |
| Group.Read.All | Application | Group Reconciliation |
| Group.ReadWrite.All | Application | Create Group, Update Group, Delete Group |
Built-In Roles
| Role | Role Description |
|---|---|
| User Administrator | The User Administrator role allows the management of user accounts, licenses, and group memberships within Microsoft Entra ID. This role is primarily used for managing the lifecycle of users, including creating, updating, and deleting users. It is ideal for helpdesk or human resources personnel who need to manage user information and user-specific settings without having access to higher-level administrative tasks. The User Administrator role can perform a variety of tasks, including: - Managing user accounts (creating, deleting, and updating users). - Manage passwords for non-administrators. - Manage group membership, including security and distribution groups. - Assign and remove licenses. - Assign administrative roles to users, except for highly privileged roles such as Global Administrator. |
| Privileged Role Administrator | The Privileged Role Administrator in Microsoft Entra ID is responsible for managing role assignments within the directory. This role is specifically designed to manage, assign, and remove privileged roles in Microsoft Entra ID. A privileged role is one that has higher levels of access within the system, allowing critical actions such as the creation and management of other administrative roles, including themselves. The Privileged Role Administrator role can perform a variety of tasks, including: - Assign and remove privileged roles such as Global Administrator and Security Administrator. - Manage PIM settings, including approval workflows and activation settings for privileged roles. - Initiate and review access to roles through access reviews. - Approve or deny role activation requests in PIM. |
| Application Administrator | The Application Administrator manages both enterprise applications and app registrations in Microsoft Entra ID. This role is responsible for configuring Single Sign-On (SSO) settings, managing application permissions, and handling user consent for application access. The Application Administrator is often used for managing integrations with third-party applications and custom applications that rely on Microsoft Entra ID for authentication. (IDHub in this case) The Application Administrator role can perform a variety of tasks, including: -Manage all aspects of enterprise applications, including user assignment and SSO configuration. -Create and configure app registrations for custom-developed or third-party applications. -Assign application permissions and handle user consent. -Manage application proxy settings for on-premises apps. |
- Global Administrator role gives you the ability to manage all aspects of Microsoft Entra ID and Microsoft services that use Microsoft Entra identities
- To know more about Entra ID Roles, view doc here.
How to grant permissions
To add permission, see below steps:
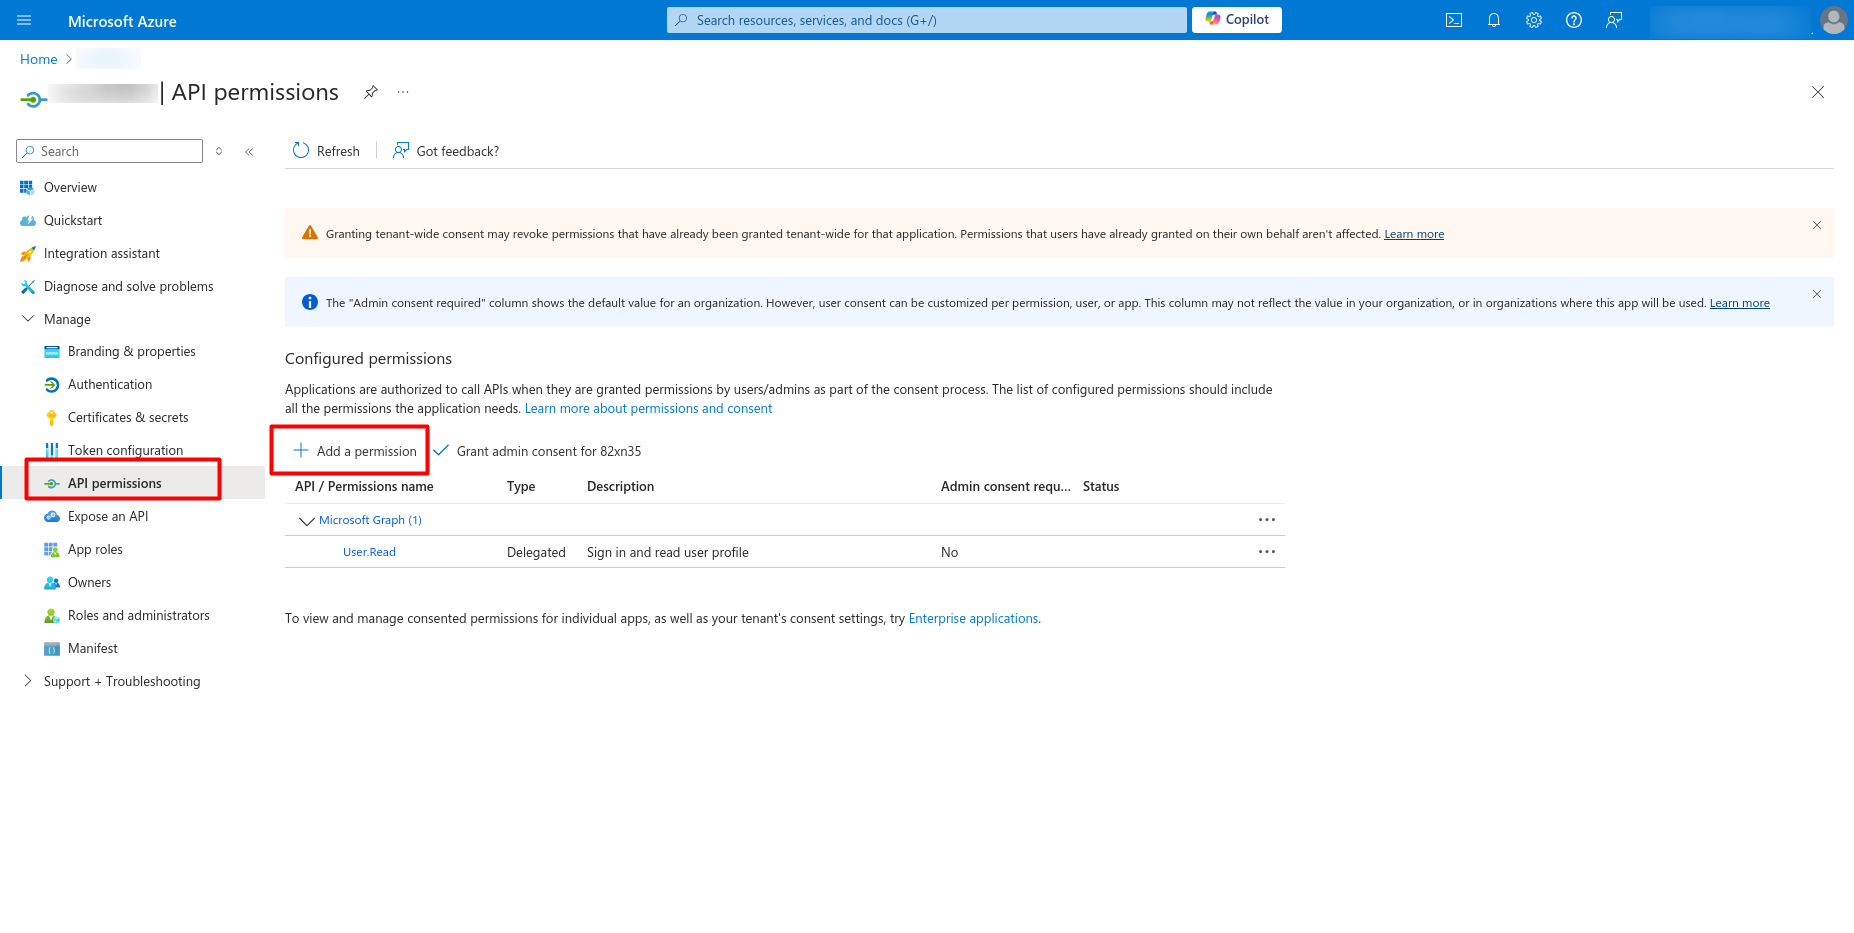
- Go to the registered application and click on Manage --> API Permissions and then on Add a permission.
- In the window that pops up, click on Microsoft Graph
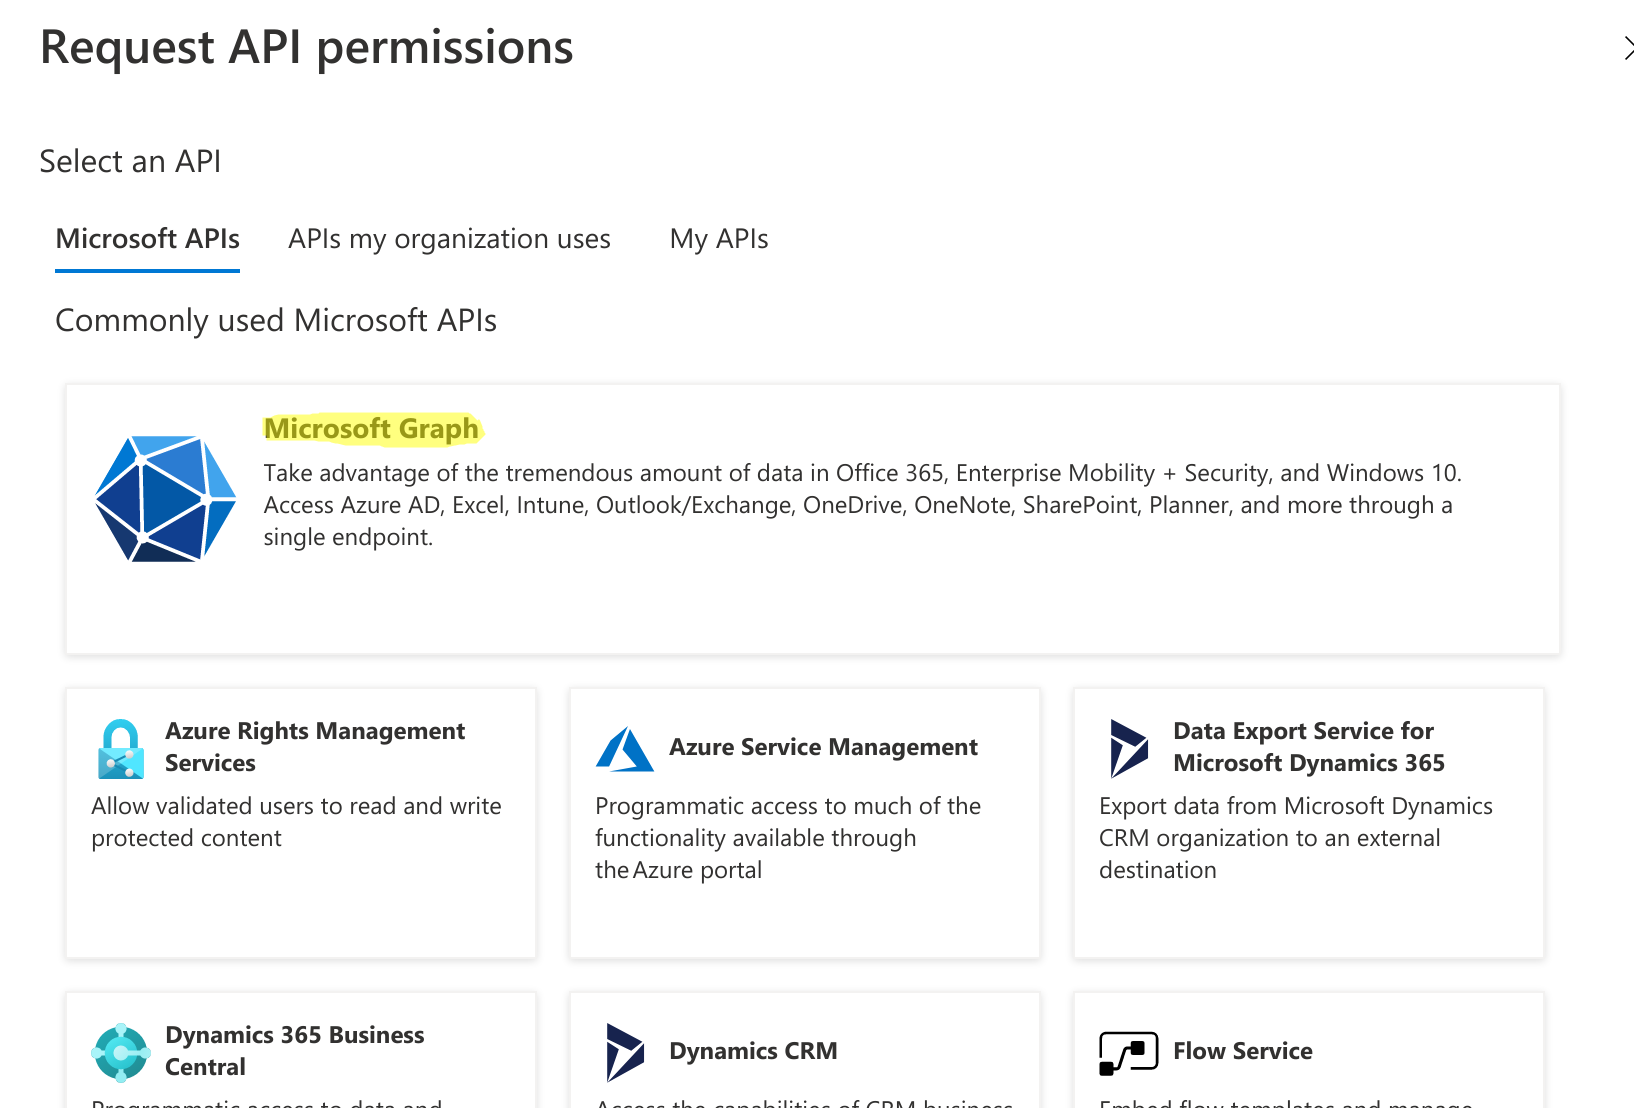
- Click on Application permissions
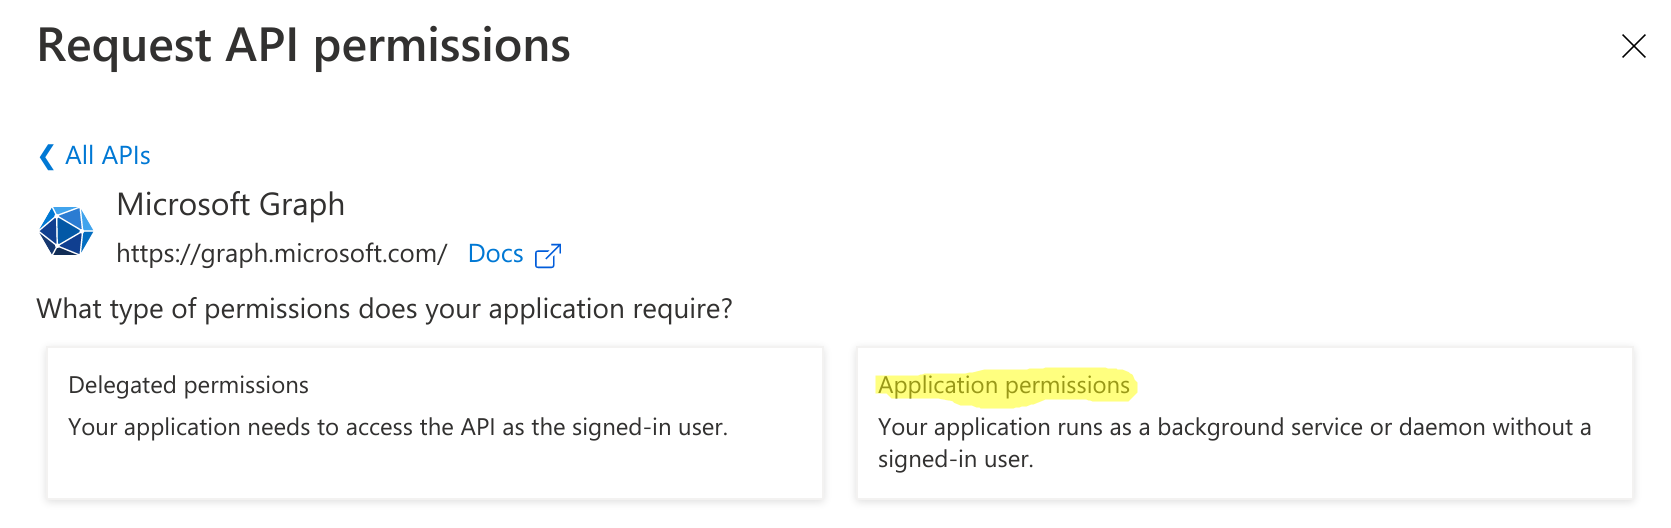
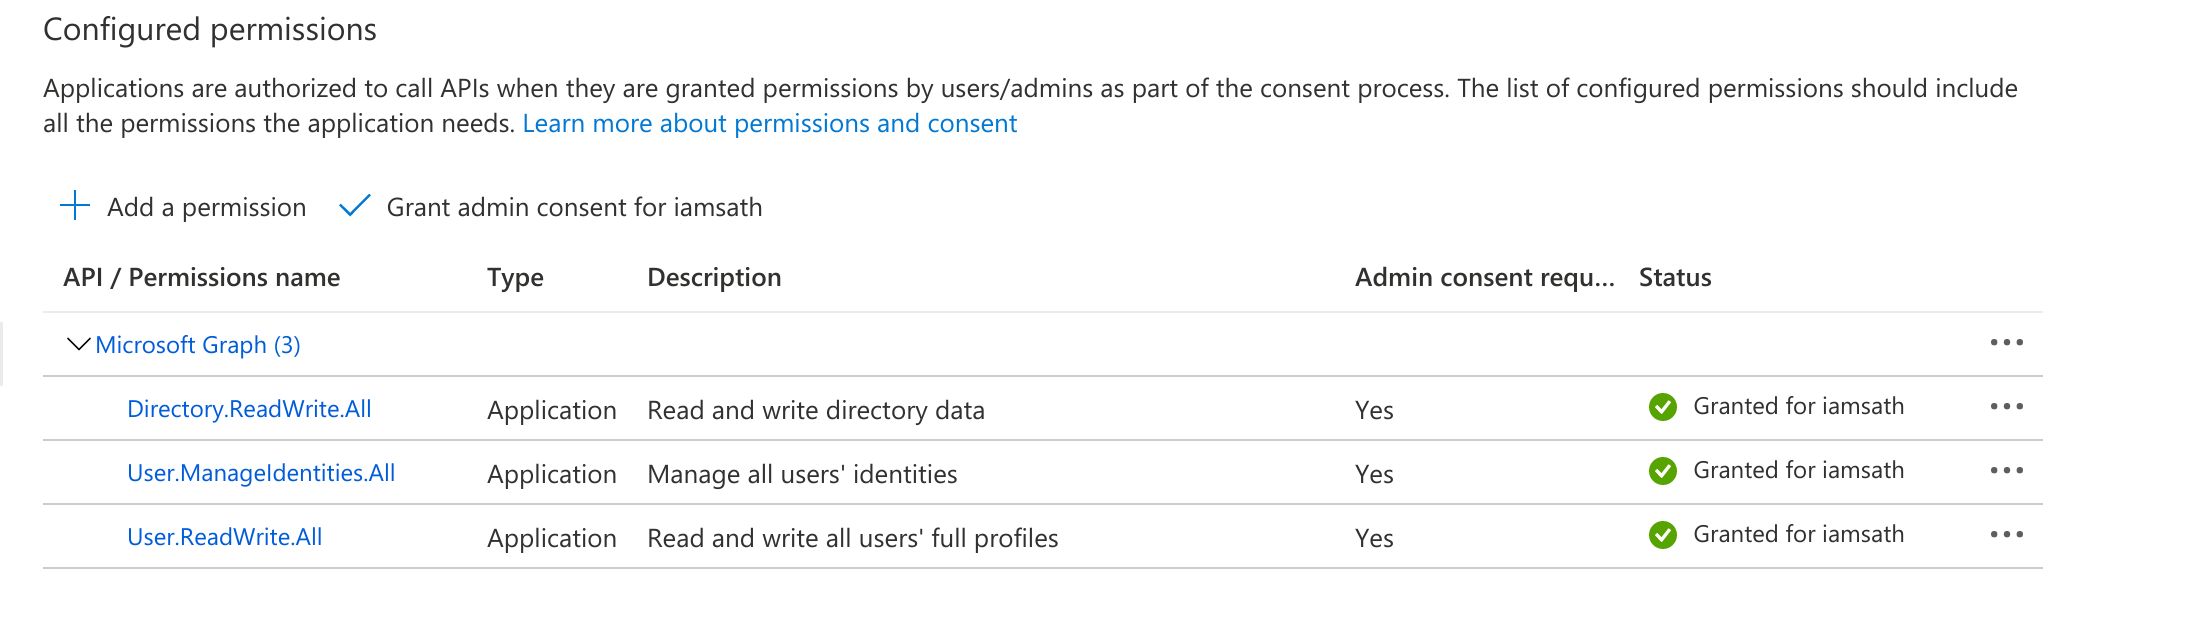
- Search and add the following Application permissions - See example below:
- Directory.ReadWrite.All
- User.ManageIdentities.All
- User.ReadWrite.All

- After adding all the permissions, the Status initially shows as Not granted. Click on “Grant admin consent for..”
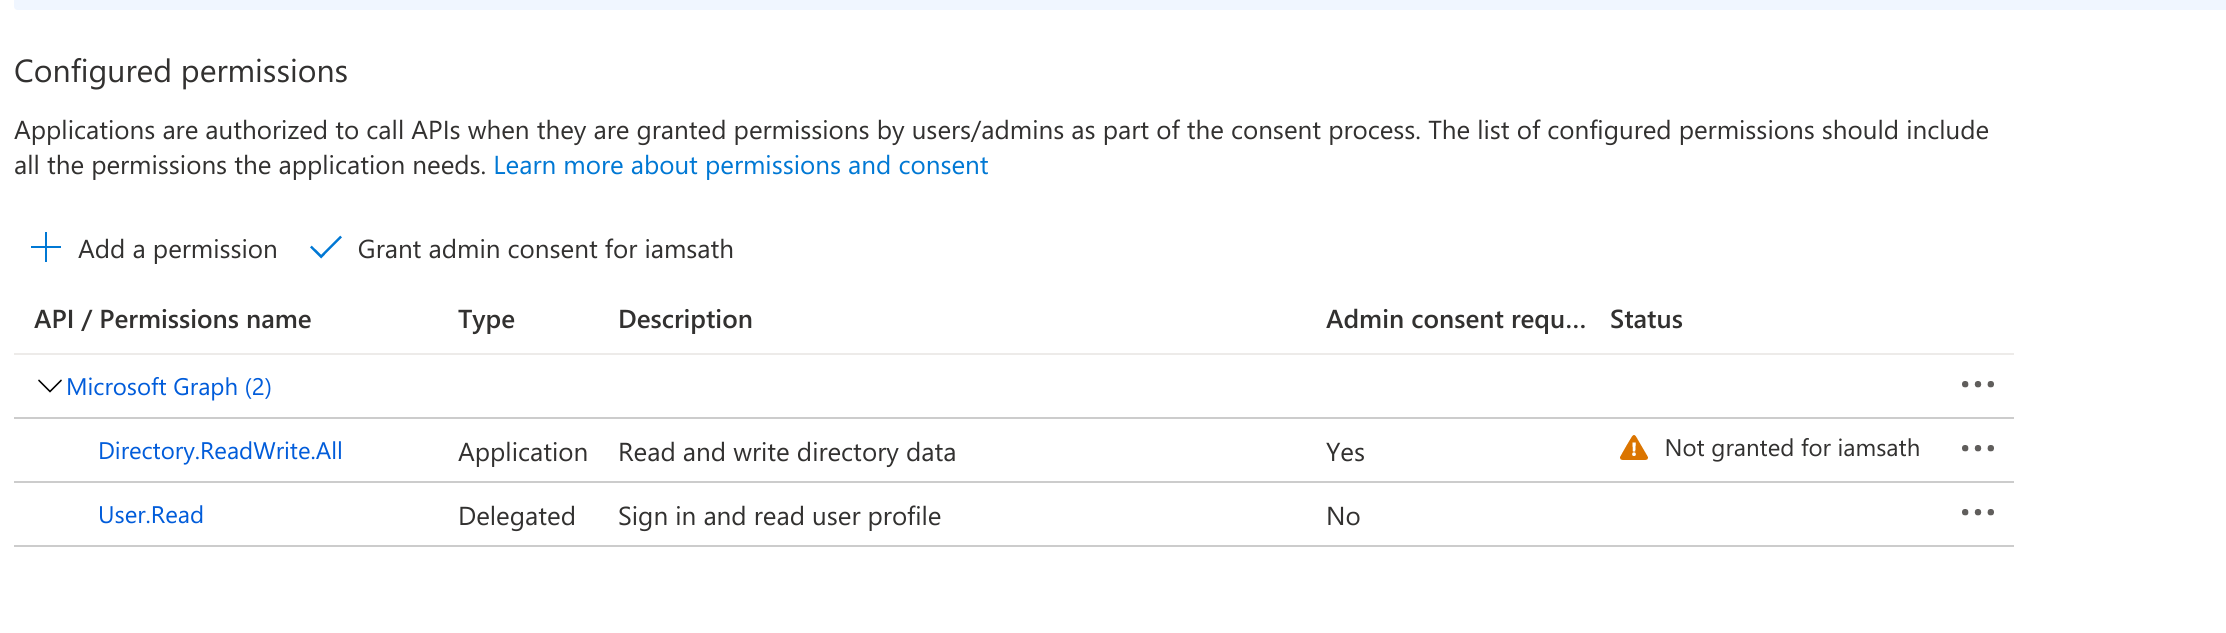
- After granting the permissions, a green tick mark should be seen under the status column for each of the permissions